Wednesday, May 6, 2015

Lessons from An Electronics Noob

One of my great heroes, Jeri Ellsworth, has spoken publicly (and made a great video) about the importance of trying and failing in learning electronics.

I personally am tempted to generalize her statement to everything else. In fact I would say that is the great genius of Agile methodologies and Test-Driven Development in particular.

On Saturday, I got my "test preemie" working---a success.  Monday I started on the incubator, thinking it would take about 3 hours.

And failed, and failed, and failed some more.

I had it all working on the breadboard---easy as pie.  But breadboards are fragile. I don't want to go to Mini Maker Faire with a breadboard.  I wanted to solder up a prototyping board to make a sturdier solution.

Using tips suggested by this gentleman for prototyping, I laid out my protoboard, and bent the components into place.

I soldered it up, and it didn't work. I had missed a connection.  I fixed it, and tried again, and it didn't work. I realized I had soldered the MOSFET in backwards.  This is easy to do---the little ICs are little on 3/10ths of an inch wide and they aren't "marked" in anyway---you have to look at the data sheet to which pin goes where.

So I painstakingly desoldered it. Desoldering is harder than soldering; you have to use a "solder sucker" and then "soldering braid" to wick up the molten solder.

And, if you bent the pins of the components over as hinted above, it is even harder to get them out.

Then I carefully resoldered the MOSFET back in --- the WRONG WAY AGAIN. Imagine a face palm that evacuates the brain pan.

So I carefully desoldered the MOSFET again.  With each operation, my board was getting messier and messier.

Then I put a clean MOSFET in---and it worked!  For about 4 minutes. Then I broke one of the pins leading to the Arduino off.  No worries---I could just solder a new lead in place. To make it sturdier this time, I stripped a solid 24 gage wire and soldered it in.

Then, nothing.

It seemed to draw current but wouldn't heat the little 8 Ohm resistance cloth to keep the baby warm.  So, to try to isolate it, I took it over to my power supply, away from the Arduino, and tested the MOSFET and heater load in isolation---or so I thought.  It soaked up every amp my power supply would give and converted into heat---INSIDE THE MOSFET, which began to smoke, right before it melted the plastic off my leads.

Trying again and again, it behaves as if there is a short INSIDE the MOSFET.  I don't know if this possible, or if somehow I have a stray gob of solder which neither my eye, nor the multimeter can see.

I spent at least 10 hours debugging this, and am completely stuck.  So, I am retreating but not surrendering---I ordered some new MOSFETs and will build a completely new board when I get them.

Until then, I will try to do the same thing a "relay", a physical switch which does what a MOSFET does more reliably.

I have learned:

  • This stuff is hard and takes practice to develop basic skills.
  • It is easy to make mistakes which make things very confusing.
  • You could probably learn a lot from watching someone experienced do this. YouTube videos are the best I have in that department.
  • Breadboards are fragile.
  • Soldering sucks.
  • This is an excellent way for a grown man to feel stupid.


Saturday, May 2, 2015

An Artificial Test Preemie for an Incubator


I've been working with the Greater Austin Chapter of Engineers without Borders.

One of our projects is the creation of a low-cost incubator for premature babies.  Preemies can't keep themselves warm. This is similar to the excellent work of Embraceglobal.org, but we are aiming for an even cheaper cost-point.  We are beginners; we do not believe we are going to outperform or compete with Embrace or make a life-saving tool in the short term.

I have been strongly influenced by the my acquaintance Kent Beck and his methodology of "Test Driven Development" (TDD). I don't claim to always use TDD in my career managing programmers, but I use it in most of the programming that I completely control.

If you want to build an incubator, you need a test baby.

As part of trying to learn to use the Arduino (and some basic electronics), I built a Test Preemie.  The basic idea is to have a physical doll smaller than a full-term infant that lets you have a visual indication of when it is a proper temperature.  Additionally, it lets you read the precise temperature from the USB port of the Arduino (and its history.)  You can't put the Arduino in the incubator because it is its own source of heat. I needed a way to put a visual indicator and the temperature sensor on the end of a wire so that the Arduino controller for the Test Preemie can be kept separate.

Presumably, a completely different Arduino or other control mechanism will actually control the heat, or the alarm, for the incubator.

What we are trying to do with the Artificial Test Preemie is to make testing easier by giving you both an independent temperature measurement, and a physical object to test with.

Obviously, there are improvements to this---we'll discuss that at the end of the article---but for now I would like to tell you what I did, in order to document it.  I'm not particularly proud of this work, but in the PIFAH project I try to document everything.

(I documented all of this as I did at EWB GitHub Repository, but am rewriting it for this article.)

So the basic approach is to use a standard TMP36 temperature sensor.  This requires 3 wires: +5V, Ground, and the signal (temperature) wire.  As an initial design, I just want to let you say if the preemie is too cold, just right, or too hot.

Luckily, both the TMP36 and a multi-color RGB that can glow blue (too cold), green (just right), and red (too hot) is included with the Arduino Experiment Kit (ARDX), including a nice explanation and bread-board diagrams for how to use use them.

The code, which is called a "sketch" in Arduino programming, for using these basic circuits is also included.

So basically I just implemented these circuits separately (and simultaneously) on my Arduino, and mashed together the C-code for each circuit.


It is traditional, and almost always best, to build a circuit first on a breadboard as shown above, which is included with the ARDX. However, breadboard are fragile.  I wanted something sturdier for the testing of the actual incubator (which I haven't started yet).  Also, I wanted something to show at the upcoming Austin Mini Maker Faire, and something sturdier was required.

I had some old 8-wire telephone interface network wire.  I used this to run the wires the foot and half from the Arduino to the Preemie.

Arduino experts build "shields", which are pluggable components for expanding the Arduino. However, I didn't have one, and I wanted a stand alone system.

Remember, I am not very experienced with electronics, not even the basic of how to make connections.  So I'm describing below a home-grown solution---I don't claim this is good or recommend it.

What I actually did:

  1. I got my daughter to volunteer an old doll for this purpose that is at least smaller than a normal full-term child. 
  2. I tested the RGB LED circuit from the ARDX, and made sure that I could control the color.
  3. I tested the Temperature sensor, and made sure I could measure temperature correctly.
  4. I put both of these on a breadboard, and wrote a sketch that controlled the RGB LED circuit from the temperature, seeing a minimum and maximum temperature to control the color.
  5. I cut 18" of telephone wire, and carefully cut away the vinyl wrapping, then carefully stripped the insulation of the end of each of the colored wires (I only needed 7 of the 8.)
  6. I carefully wrote out a plan of what color I would use for the pins on the Arduino and the pins on the TMP36 and the LED.
  7. I soldered the correctly colored wire to my RGB LED. I wired the resistor in-line.  This is critical---if you miss the resistor it calls for, even for 1 second, you will burn out your LED.


  8. I tested again by plugging back into my breadboard (which still had the temperature sensor).
  9. I scored a Radio Shack perf board and broke off a single line of pad to be able to solder.
  10. I broke off a line of 3 male-to-male connectors that came with Arduino spare parts kit.
  11. A soldered the correct wires that connected to the RGB LED to the short sides of the male-to-male connectors, making a tiny "plug" that I could insert into holes 9,10, and 11 of the Arduino digital output (as the original circuit called for.)
  12. I tested this again.
  13. Then I soldered in the TMP36, and tested that that worked at the end of my wire.
  14. Then I soldered that to a different 3-pin plug that I made (different because it is physically on the other side of the Arduino Uno.)
  15. Then I tested that again.
  16. I soldered the TMP36 signal wire to a single male-to-male connector (because it is in a different location and could not be grouped with the others.
  17. Then I tested that again.
  18. I carefully wrapped all the exposed wires in electrical tape.
  19. I inserted the LED at my doll's neck, and put the temperature sensor at her belly.
  20. I tested again, and used some extra electrical tape to try to combat the fragility of my solder joints.
Note that in doing all of this my soldering and wire-stripping failed several times.  Once the power wire broke.  I tested each solder connection with my multimeter before I accepted it.

Doing hardware work requires just as much testing as software! If I had been working with someone else, I would have treated this as a series of written stories with estimates and tests.

Then net result is a physical Test Preemie which is more sturdy than a breadboard (but still dangerously fragile.) The photo at the top of this article shows that.

I now feel ready to work on using a completely different Arduino, a MOSFET, and a lantern battery, and a heating strip to try to actually keep the Preemie warm enough to survive.  By building a test apparatus first, I can follow the "Red/Green" testing paradigm. I am beginning with a failing test---they baby is cold---and will try to create a Green test and keep the test Preemie alive.

The Sketch for the Arduino can be found here.

I invite you to collaborate with me and Engineers Without Borders in this open-source project of building a new kind of infant warmer!  Maybe, maybe, after a lot of testing, we will save a life.

* * *

I hope that the reader will think of improvements and open them as Issues at the GitHub Repo: https://github.com/PIFAH/EWB/issues.

However, it is clear that this could be made sturdier, could use a smaller wire, could be a complete datalogger, could have an LCD temperature readout, could be made out of a doll the mass, heat capacity and thermal conductivity of a baby, and could be turned into a training tool.  I'm not going to enter those thing as issues, because my goal here is to get involvement from others.  There is no need for the test apparatus to get TOO far ahead of the actual incubator.


Friday, May 1, 2015

How I Spent April and Engineers Without Borders

When I resigned from the government, I had planned to spend the entire month of April watching movies.

Instead, I built and electronics lab, published 25 of my ideas, and have been trying to learn basic electronics.

Possibly this is a sign of mental instability.

I have been working a great deal for the Instrumentation Group of the  Austin Chapter of Engineers Without Borders (EWB).  I'm doing this in part to stay involved with other people and avoid navel-gazing.

EWB does engineering. They are not really doing "invention" in the sense that I want to do it.  They are producing potentially novel solutions but they are "designs" not "inventions".  For the most part, what we are trying to accomplish is relatively straightforward electrical engineering based on using an Arduino.

This is aligned with what I want to do, however, because:

  • It is helping me to learn basic electronics.
  • Many of published ideas require computer control in one way or another, and mastering micro-controllers will help.  In particular, my various ideas around biochar production will benefit from this.
  • I have always believed the greatest room for invention is that intersection of software and they physical world, despite the fact that I personally am more expert at pure software.
EWB Austin is heavily influenced by the University of Texas members. It is going to shut down for the summer.  We have been invited to the Austin Mini Maker Faire, and am working to have several of our Arduino project ready by May 16th.

When I have done this, however, I am going to go back to more of the invention-oriented work I have written about.

As always, I welcome collaboration---y'all don't be shy.  I'm happy to shift priorities based on what excites others.

Thursday, April 16, 2015

My Best 22 Ideas, and a Personal Invitation

The public inventor works in the light.

Transparency facilitates cooperation. I've published my best 22 ideas at GitHub, a platform for shared collaboration. Comments are welcome. The quality of my presentation will improve, but never delay publication to improve quality---release early and often.

 I apologize for those of you who may be unfamiliar with GitHub. You should be able to at least read the ideas above, and you are free to email me, but I would rather you comment publicly at GitHub by opening an issue there so that all can see your comment.

I believe the goals of PIFAH deserve a full explanation, which I have not prepared. However, you can find my personal invitation and a vision statement at the GitHub repo. Here is the README at the GitHub repo:

 Public Invention for All Humanity 

 A Personal Invitation 


The creation of new technology is not the only or best way to help our fellow-beings. Love is more important than lasers, and kindness more important than computers. Still, many of us are better suited to serve humanity in code than in a sermon, or holding a test tube rather than the hand of the dying. If you are one of those persons, I invite you to participate with me in a project I call Public Invention For All Humanity (PIFAH). Throughout 2015, we hope to run a number of projects best described as “inventions” that will be valuable to humanity. This is not particularly original. This is yet another project in the exponentially growing tradition of working for the public good.

What we do hope to use some modern principles:

  • We will be completely transparent and open from the first. 
  • Everything we produce will be shared to everyone without exception. 
  • We will organize our using an Agile methodology, whether our work is software, hardware, research, or education. 


In other words, this will be an free-libre open-source project that welcomes participation from the public and seeks to organize work so that the work so that as many hands can pitch in as possible, and so that as many voices can contribute as possible.

 I am not committed to this project. If I find an existing project that can utilize my talents better, I may drop PIFAH to assist others. I don’t want this to be about me.

But of course that is inevitable, at least at the beginning. There is no point in false humility. I really want to act as the head coach of PIFAH, and I think I can do it well. I have an adequate technological resume, particularly as a computer programmer. More importantly, however, I enjoy leading teams and am good at it. I mentor people well. Finally, I am able and willing to devote myself full-time to this project, at least for a while.

You may wish to examine our project concepts to see if any appeal to you.

-- Robert L. Read, PhD

How to Contribute 


We welcome your participation. You are welcome to email me at <read.robert@gmail.com>. However, as a public project, it is even better for you to comment publicly. You can do this by opening an "issue" here at GitHub. If you want to add to or improve one of the existing documents, you can do this with a "pull request". 

 In general, each project will have a set of "stories". This is a technique developed by the Agile community. We welcome you to take on the execution of a story if that fits your talents. Writing new stories is also very important activity. 

I hope that we will have need for many talents. I am a computer scientist. I greatly admire artists but don't pretend that I can create art. We will always have a need for artists, writers, and educators. We will also need chemists, welders, mechanical engineers, 3D modellers, software engineers, physicists, biologists, mycologists---we exclude no field of endeavor. 

In summary, you can contribute by:

  • Suggesting a new project, 
  • Working on a story,
  • Offering to improve our art or writing, 
  • Offering to lead a project, 
  • Teaching us something new, or 
  • Even suggesting non-PIFAH proejcts that we should contribute to. 


If you are not familiar with GitHub or git, please email me to give you assistance.

Warning 


Some of the projects proposed here involve dangerous chemicals, powerful forces, fire, explosive gases, and biological hazards.

The important thing is to remain safe  at all times and not to proceed with an experiment until you have proper safety equipment and training. In particular, although we encourage young people to participate in PIFAH, they should not participate without adult supervision.

We will attempt to discuss safety precautions within each project. However, because this is a distributed project and each participant may be creating their own experiments and machines, it will not be possible for us to provide safety guidance in all cases. Please proceed carefully at your own risk.
  Creative Commons License
PIFAH Personal Invitation by Robert L. Read is licensed under a Creative Commons Attribution-ShareAlike 4.0 International License.
Based on a work at https://github.com/PIFAH/PIFAH.

Wednesday, April 1, 2015

Waterfall Assisted-Acquisition Services, Training, and Education


by Dave Zvenyach and Robert L. Read, PhD

18F Consulting cares about our customers. We want to give you not what you need, but what you want. Developing software is difficult; we understand you want a methodology that provides you with plausible deniability. So, today, we are proud to pre-announce our latest offering: “Waterfall Assisted-Acquisition Services, Training, and Education” (WAASTE).

The federal government has spent literally years perfecting this WAASTE methodology. When it
is released, we promise it will support these features:

  • No matter how simple the use case, every component will be highly engineered using the most baroque processes currently available. 
  • WAASTE ensures a turnaround time comfortable for government: no faster than 2 years for the first set of deliverables. 
  • With WAASTE, project managers have no work to do beyond the initial requirements, ensuring maximum vendor ability to slavishly follow your initial thoughts through to a final product.

18F Consulting is committed to delivering WAASTE to you before our money runs out. In the
mean time, any agency interested in WAASTE should spend two years carefully analyzing
exactly how your software will be Blackberry-enabled 5 years from now. Technology changes
quickly, but the ideas of government are eternal and unchanging. WAASTE guarantees lock-in
of the current understanding of technology through this protracted process.

Through our proprietary WAASTE Requirements™ gathering process we guarantee at least
1500 small, isolated, capricious, and incongruous WAASTE Requirements™ presented to you
electronically in a state-of-the-art XML file. For an additional fee we will conduct focus groups to
provide the exculpatory appearance of respect for user input, but of course their input will not
affect the WAASTE Requirements™. Completely free of charge, we will prioritize all WAASTE
Requirements™ based on our feelings at the time.

In recent years, pernicious new fads such as “Test-Driven Development” (TDD) have emerged,
threatening the very core of the WAASTE methodology. 18F Consulting is reacting by
developing our own alternative test restriction system, called Delay-Oriented Assessment
(DOA). Our methodology prevents duplicate effort by assiduously postponing testing until the
last possible moment. DOA permits testing only by entrusted QA experts, untainted by
knowledge of the project or its users.

To be completely WAASTE-ful, we limit communications to tightly defined narrow channels
through detailed memoranda, a process we call MemOnly (patent pending). In-person
interactions create the possibility that teams will deviate from the WAASTE Requirements™.
For maximum WAASTE, you control all communications. You get to specify your project in
excruciating detail. Eventually, your precise vision will be implemented. If the project is deemed
overbudget, past-deadline, and a total failure by end-users and higher-ups with unrealistic
expectations of working software, you can simply exhibit mountains of paperwork and walk
away.

We realize that others might promote “modern” software development practices such as set
forth in the “Agile Manifesto.” We at 18F Consulting are preparing our own comprehensive
response in a Waterfall PowerPoint Presentation, drawn from the outstanding track record of
success in Federal IT procurement. We expect it will be published any year now.

If you would like to make your next major project WAASTE-ful, please fax us a detailed
memorandum.

(Please note, the WAASTE methodology is proprietary to 18F Consulting, notwithstanding 17
U.S.C. § 105 or 18F’s Open Source Policy)

Happy 1st of April!

Sunday, March 22, 2015

LibrePlanet 2015 Was Great, and Some Suggestions for 2016

LibrePlanet 2015 was good. I learned:

  • That VMWare is flatly refusing to comply with the GPL and the Software Freedom Conservancy has felt compelled, after years of trying to work with them, to sue them. I am becoming a member of the SFC as of right now.
  • That freedoms are continually eroded, and every expansion of freedom leads to new attempts to subvert it, often very subtly.
  • The fact that most hardware systems are making it very difficult to run free software.
  • I learned of software systems I had not known of before:
  • eleg.io, a system for automatically finding the provenance of images: http://elog.io
  • Tahoe-lafs, a distributed file system: https://www.tahoe-lafs.org/trac/tahoe-lafs
  • Scala, apparently an emerging winner of functional languages: http://www.scala-lang.org
  • A secure social network (doesn't look ready for prime time): http://pump.io
  • TOR, secure browsing: https://www.torproject.org
  • PublicLaboratory, Do-it-yourself science with an environmental focus: http://publiclab.org
Mostly, I was reminded the precious gift that Free Software has given the world.  Without the GPL, there would be no Linux. The would be no Wikipedia. No Android OS. Probably no Mac OS either. All of us benefit from the the work of the Free Software Foundation, whether we know it or not and whether we contribute back or not.

And I would like to see even more next year.  Here are some things that I would like to participate in next year.  I believe if these could be organized alongside the typical tracks it would make the conference far more life-altering.
  • Hack parties.  Perhaps these were going on, and I just didn't get invited. But I believe organized, or at least, seeded, or suggested, work parties, would allow participates to have the pleasure of more strenuous stimulation and deeper social interaction.
  • Activism exercises. We could, for example, have a one-hour session specifically to inform people about the Software Freedom Conservancy and their action to defend the GPL by bring VMWare into compliance.
  • Crypto parties.  I don't know much about practical cryptography, and I care less about it than a lot of people.  But I want to learn. This would be a great place to invite outsiders and the media.
  • A "Learn about Licensing" practical session.  This could also be opened to the public. I believe this could be combined with a campaign to get GitHub users to use, or switch to, or "fork into" free licenses instead of merely permissive licenses.

Saturday, February 14, 2015

Learnings from sewing a Nightie


I sewed this nightie for my wife for Valentine's Day.  Of course, I bought her one from Macy's as a backup---some risks aren't worth taking.

I used primarily a video by GiannyL as a basis.  However, I made some modifications---I made the spaghetti straps myself out of the same material, and my wife wasn't interested in any lace trim.

How does it compare to store-bought night gown?

The neck curve puckered a little because I didn't notch it.
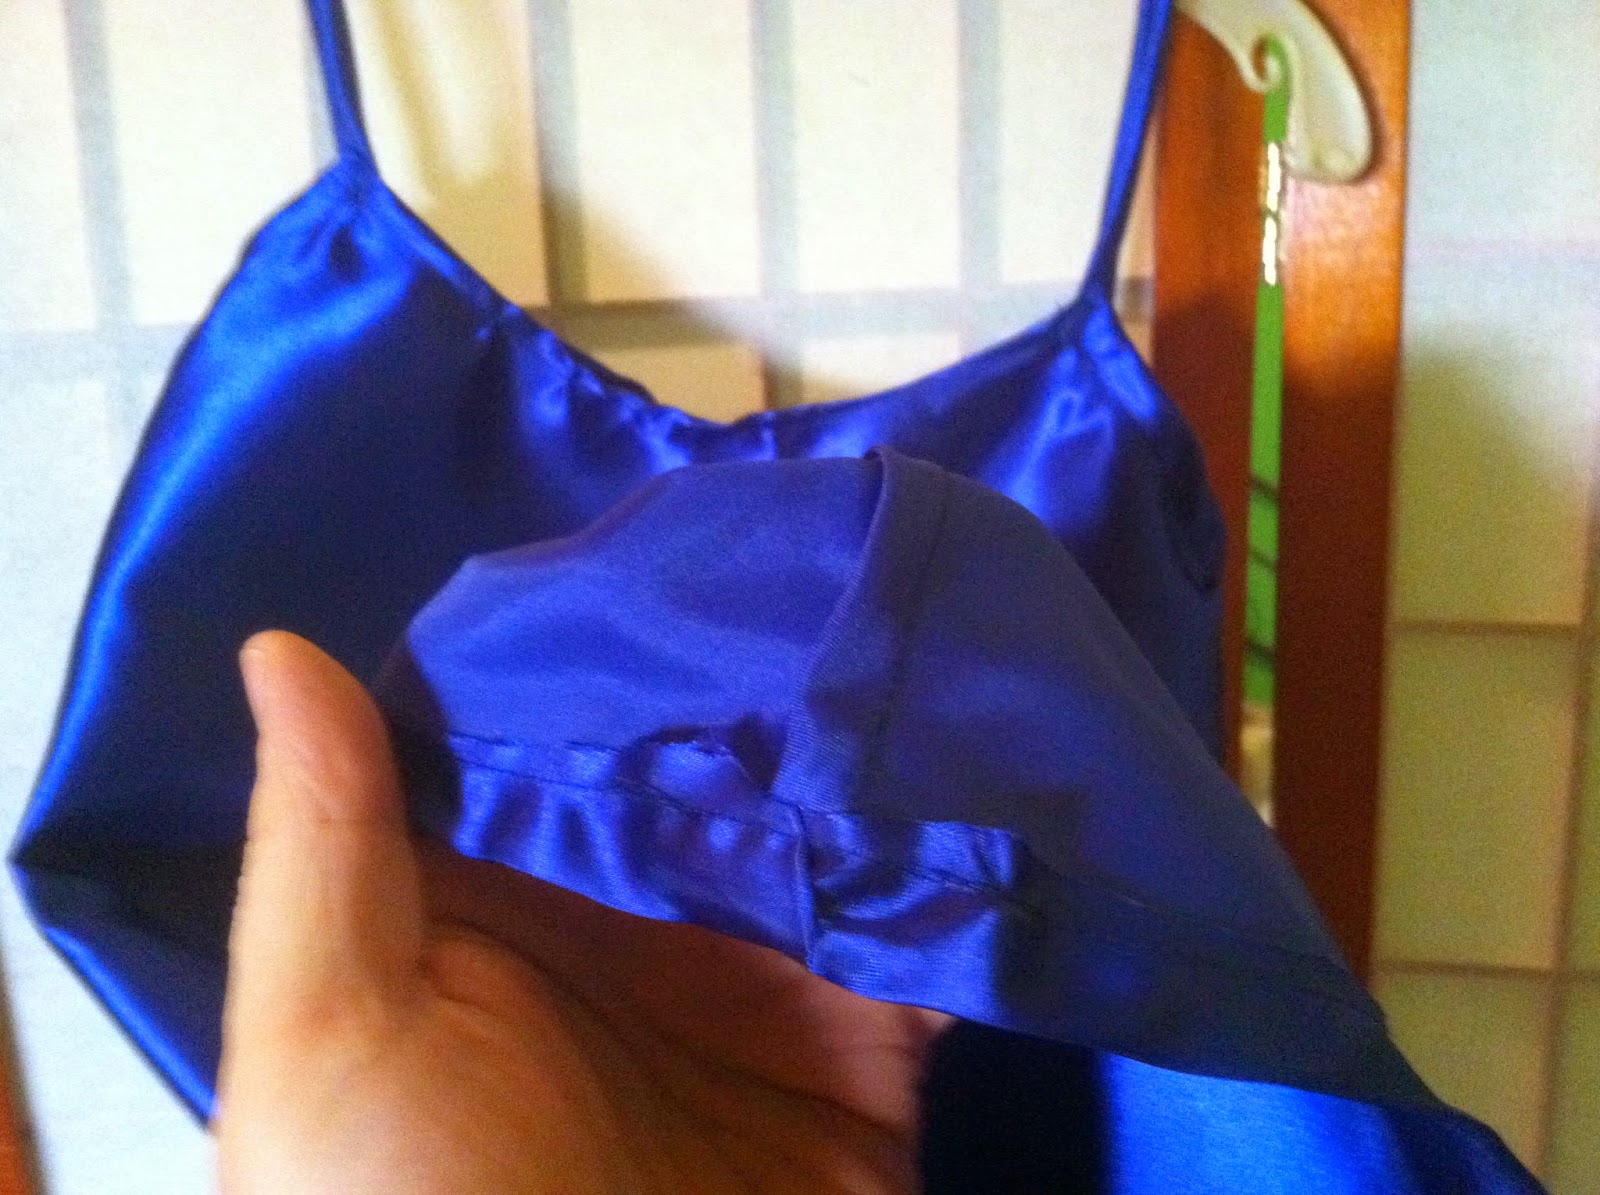
You could probably buy a comparable garment for $25-50.  I spent $20, and ten hours.  The looks are comparable.  My seams are imperfect, but if you don't look closely you wouldn't notice, and when my wife is wearing it I have better things to look at.  I suspect my garment is "sturdier" --- but who needs a sturdy nightgown?  The one advantage is that I did get to choose precisely the color I wanted.  My wife is a redhead and looks great in royal blue.  The "satin" is really polyester with a shiny side and a less shiny side. The less shiny side is a little coarse to be against skin, so I made this harder than GiannyL's construction by using a French seam on the sides.


A French seam runs up the side, but the bottom doesn't need it.

What I Learned

  • I need to research fabric more. Satin looks nice, but isn't really a great fabric for sleepwear.
  • Sewing curves perfectly requires cutting notches or some other technique that I have yet to master.
  • Satin has zero give. You have to fit it perfectly. Luckily, I was able to do that.
  • I tried to make this with a fitted waist as GiannyL shows.  But my wife's bust is a few inches bigger than her waist.  I made the first model to my wife's waist size, and she couldn't get the waist over her bust. I know this must be obvious to any woman, but now I understand why a standard tight-fitting woman's dress has a zipper in the back: otherwise you can't put it on!  That is really the difference between this garment and a cocktail dress.  To make a dress, I would take in the waist and add a zipper.  Instead, I cut it completely straight down the sides, so basically the waist is the same size as the bust.
  • You can fix things with a seam ripper---but not using the kind of thread I was using with short stitch on satin.  It was impossible to unpick a seam in this situation.
  • Taking body measurements work, but with this fabric, you have to be very precise.
  • Sometimes the garment ends up looking good even when you do a poor job with the details.

Was it worth it?

Once again, in pure economic terms, this was a catastrophic failure: I made about $1 per hour, and have some scrap satin left over. However, if the lessons learn allow me to someday make a properly tailored dress that my wife might be willing to wear, it might be more economical.  In terms of learning and the finished garment, it was another step up the learning curve.